Microgreens
January 15, 2015
Happy New Year!
Here we are again at the beginning of a new season for growing.
What?? Is January not part of growing season because it’s cold, bleak, and dark outside?
Perhaps. Aren’t we all craving those tender, leafy greens of spring?
What about starting the growing season now, indoors?
There are some greens that you can very easily grow on a windowsill or under grow bulbs.
Think of your indoor garden and a micro garden. Choose quick starting leafy vegetables, such as mesclun seed mixes, mustard, arugula and spinach, that are high in nutritional value as micro greens and are very easily sown, grown, and harvested in batches. Since they will be harvested young, their roots systems will not require a deep container of soil, so readily available plastic containers, such as pre-packaged salad containers, and food take out containers, work very well. Make sure the container has drainage holes.
Choose your greens mix or single crop batch and scatter thickly in soil that is at least 1 ½ to 2 inches deep. Cut a piece of cardboard to fit the footprint of the container and press the seeds into the soil with the cardboard. Lightly scatter a thin layer of dry potting soil over the entire surface of your micro garden and, using a spray bottle, lightly mist your seeds until the soil has been moistened completely. Make sure your drainage holes are working and place a drip tray underneath.
Locate your container either in a south-facing windowsill or under grow lights and expect germination within 3 to 7 days. Keep the soil moist but not soggy, and empty the drip tray if saturated. You may harvest your greens as sprouts (about 7 to 14 days after germination) or allow them to reach a few inches in height before harvest. Harvest by cutting or snipping the greens just above the soil line.
These nutrient boosters are a wonderful addition to salads, on sandwiches, and a welcomed burst of Spring color during these cold days of winter.
Video about growing mico greens here.
Microgreens instructions with pictures
 Fast Fall Crops
Just because the overnight temperatures are dipping below 60 degrees, does not mean that you can’t extend your growing season into the late fall months. There are several easy crops that will withstand low temps, even thrive on them, and they grow relatively quickly. Here is my top three:
1. Radishes. OK, so I never liked radishes as a kid, maybe you didn’t either. However, these hardy little gems are now one of my favorite crops because they allow for instant gratification. Radishes germinate very quickly, are relatively easy to grow, and come in a variety of colors, giving a visual burst of energy to your palette of fall veggies. The only draw back with growing radishes is that, like carrots and beets, they need to be thinned or they won’t get very big. However, small is also good when it comes to radishes, so if you don’t have time to thin them before they begin to mature, the bite sized versions are a welcomed treat come November 1st. When sowing radish seeds, plant some about a half-inch deep and the rest a little deeper. Those close to the surface will germinate more quickly, extending the harvest by a few days. The deeper roots will be later, but larger, than the shallow ones.
2. Cool Weather Greens. Spinach, arugula, mustard greens, broccoli rab or rapini, and any of the many varieties of lettuces will all do well in cool weather and grow relatively quickly. Try companioning the mustard greens, spinach, or broccoli rab with your radishes. Sowing the seeds in the same bed will cut down on the need for weeding as the fast growing greens will compete for bed space with pesky intruders such as thistle (also edible but that’s another blog post). Sow seeds thin to medium and cover with a light coating of soil. Keep moist and cover if there are signs of an early frost. You can also transplant store bought seedlings. Water before and after planting and avoid transplanting during the heat of midday. If using transplants, try mulching to keep weeds at bay and to keep the soil cool.
3. Carrots. Most of you may know that carrots are not fast germinators but there are a few varieties that are sweet and tasty when harvested as baby carrots (not to be confused with the packages of carrot-like material we see in stores). The Nantes and Babette varieties of carrots are relatively quick germinators and can be harvested and enjoyed before they are completely mature. These two varieties grow shorter in length than most carrots and can tolerate rocky soil like we have here in South Eastern PA. Carrots of any variety do best when thinned, after the greens are about two inches high. Pull out every other immature plant, allowing about ½ to 1 inch between plants. It takes approximately 60 days from sow to harvest.
If you are concerned about below average temperatures and early frost, consider planting into a cold frame or using garden row cover and hoops. These two systems not only help extend your growing season but also are great for protection against hungry deer and other critters.
Enjoy the bounty of a fall harvest!

Yarden Volunteers – A Free For All
September 1, 2014
What is that plant growing out of my compost pile? Oh, didn’t I throw our rotten Halloween pumpkin in there last year? But, wait, that compost got really hot in the spring. Aren’t seeds supposed to die at a certain temperature? And then there is the thyme that is sprouting up…like… everywhere. This past winter was so cold and harsh. I can’t believe I have so much thyme everywhere except where I planted it. Why is that?
Have you ever noticed that sometimes plants show up in places where you least expect, AND they seem really healthy? We call these garden surprises “volunteers” and they show up for a variety of reasons; self-sowing plant activity, human or animal depositing, or wind or erosive activity.
While we may be collecting seeds to store for sowing next year in neat little rows or well organized sections of the garden, many plants are spreading their seeds this time of year, guaranteeing their future generations. Plants are not so particular about WHERE their seeds are sown. Nature, however, IS intelligent and seeds will sprout and thrive where they find the best nutrients, such as compost piles. Even if your compost system generates a lot of heat, seeds can survive in temperatures up to 140 degrees and the outer edges of the compost rarely rise to that temperature, especially if you are not hot composting. Consider that if you, a squirrel, or a bird “deposit” seeds near the outer edges of your compost pile or bin, it is very likely that the seeds will survive.
Other areas where seeds thrive are those that have not been intensely planted over time, such as in the aisles. Many of use throw down wood chips in garden aisles. As these chips decompose over winter, this loose packed decomposition creates the perfect atmosphere for seed germination. Do not be surprised of next year your creeping thyme creeps right on into the aisles via scattered seeds. These new plants can be transplanted back into beds, but the new additions may or may not be as happy in the bed as they were where the soil may be more nutrient rich.
There are also symbiotic relationships that happen among plants that can encourage seed germination is one area verses another. For example, legumes such as peas, beans, and clover are “nitrogen fixing”, that is they deposit nitrogen into the soil via a symbiotic relationship with Rhizobium bacteria. Seeds that are deposited on or near areas where legumes have grown benefit and thrive in these nitrogen rich atmospheres.
Some volunteers may show up in highly “inconvenient” places and are likely, such as squash and melons that spread voluminously, to crowd out those others you have designated space for. Most volunteers can be easily transplanted if need be when they are still young. If, however, you can allow space and acceptance for them to stay put where they arrived naturally, these garden freebies are some of the tastiest, most healthy plants you may ever encounter in your garden. Nature knows what she needs in order to create abundance and we can learn much from the lessons she offers us.
 What is That Eating My Kale???
July 29, 2014
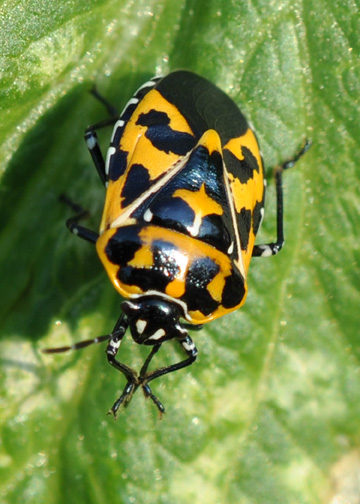
This is the time of year that garden pests come out in large numbers and varieties. From the ubiquitous Japanese Beetle to the dreaded Colorado Potato Beetle, cabbage and cucumber beetles, and the insidious squash vine borer, these buggers are hungry and are getting a free lunch at your expense. Not to worry. Here are a few organic remedies that will greatly reduce your need to use WMDs in your garden.
Neem oil is a vegetable oil pressed from the fruits and seeds of the neem am evergreen tree which is endemic to India and has been introduced to many other areas in the tropics. It is composed mainly of triglycerides and has a bitter taste. Neem oil is not known to be harmful to mammals, birds, earthworms or some beneficial insects such as butterflies, honeybees and ladybugs in US if it is not concentrated directly into their area of habitat or on their food source. It can be used as a household pesticide for ants and other pests. Neem oil also controls black spot, powdery mildew, and rust fungi.
Bacillus thuringiensis (BT) is a soil-dwelling bacterium used as a biological pesticide. B. thuringiensis also occurs naturally in the gut of caterpillars of various types of moths and butterflies, as well on leaf surfaces, aquatic environments, animal feces, insect rich environments, flour mills and grain storage facilities. They are now used as specific insecticides Because of their specificity, these pesticides are regarded as environmentally friendly, with little or no effect on humans, wildlife, pollinators, and most other beneficial insects.
Garlic Spray. Garlic is delicious…to many humans. To garden bugs it is toxic and also helps to reduce fungus and bacteria from harming your plants. Garlic can be added to a simple spray. The ingredients are garlic, mineral oil, dish soap, and water.
1. Add 4 cloves of minced garlic to a tablespoon of mineral oil and let sit for 1 day.
2. Strain out minced garlic and add the infused oil and 1 tsp of dish soap to a pint of water.
3. This ‘garlic mixture’ is in a concentrated form and must be diluted before use. Fill a spray bottle with 1 pint of water and then add 2 tablespoons of your concentrated ‘garlic mixture. Shake before using. Test on the underside of leaves and let sit for a day or two before spraying whole pant. Spray both top and undersides of leaves where bugs like to hide. Repeat as needed.
 Pruing Tomatoes to Maximize Yield
July 8, 2014
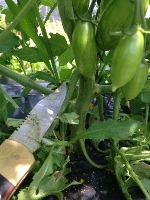
It’s a good idea to prune the bottom of your tomato plants for several reasons.
1. Those scraggly, yellow or discolored bottom branches with no blossoms are dead weight for the plant.
2. Pruning the bottom of the plant allows airflow into the middle of the plant, which helps to keep fungus from growing.
3. Keeping the bottom neat and tidy also allows you to see into the middle of the plant so you can identify any pests that may have taken up residence.
Prune those small to medium branches that have no blossoms. Usually these branches are facing downward or lateral. Prune all branches below the first set of flower clusters that develop. Prune all sucker (new growth between branches) when they are 2-4 inches long.
“A” is for Arugula
April 18, 2014
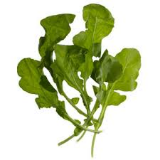
Arugula is a popular salad green that has a spicy, peppery taste and can be grown early in Spring. It is also known as Rocket Plant or even Rocquette. Germination takes 4 to 8 days, harvest 30 to 40 days. Seeds can be direct sown or started indoors and transplanted once they have a head start. Though not a perennial, arugula seeds itself prolifically, so just let a few plants go to seed in your garden and you will have a nice patch of arugula that will come back year after year.

“B” is for Beans
May 9, 2014
Pole beans or bush beans can be planted in May after the threat of last frost, for us that is May 15th. Pole beans grow on a climbing vine and require a trellis or support. Bush beans will spread up to 2 feet but do not require a support. Beans fair best sown directly on soil, planted about 1″ deep. Sow bush beans about 2 inches apart. If you like pole beans set up supports and sow 3 inches apart. For summer long harvest, plant beans two weeks apart. If you are going away, skip planting as beans will likely come to maturity quicker than you expect in hot weather.

Companion Planting in your Vegetable Garden
April 11, 2014
Companion planting is essential for a healthy veg garden. What is companion planting? Think of it as bringing your best friend to the party to ensure you have a good time. Companion plants ward off pests, attract beneficial bugs and pollinators, and can help in keeping the soil rich for plants that are hungry.
Here is an article that explains more.

Peas, Please
April 4, 2014
Early Spring is the time to plant peas. Early peas like raised beds or a sandy loam soil that warms up quickly. Peas are hardy and survive frost but don’t transplant well, so you can sow directly into well loosened soil. Space seeds about 1 inch apart and thin to about 3 inches apart. More information on growing peas can be found here.


Leave a Reply